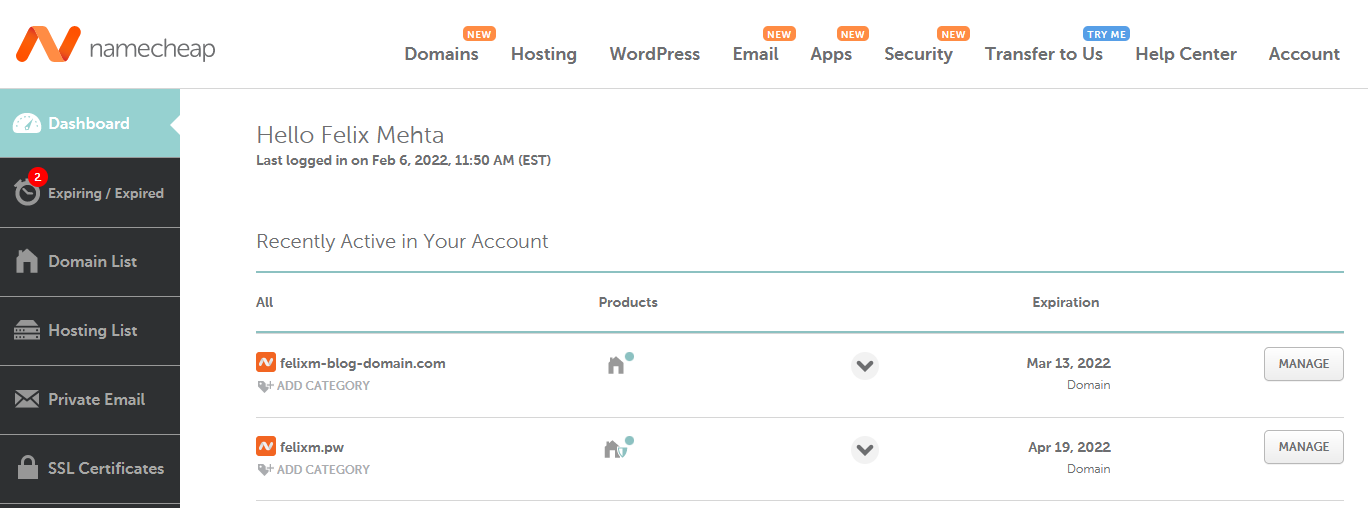
Hosting A Web Server
Contents
Intro
A common thing I hear from people after they see my site is "I should really have blog" or "You've gotta show me how to set up a site like this". After the tenth time I heard this I thought I should really put a resource out there to show just how incredibly easy and cheap it is to create something similar to this. I've been through tones of different web technologies, hosting providers, tech stacks and software before finally having something clean, elegant and fast. Today, I pass on to you the conclusion from my years of playing with web hosting to give you what I believe is the best way to host a simple website and blog. This document will walk you through manually setting up a minimal webserver which you can then take in any direction you want. If you're looking to host a website/blog like mine I'll leave you with my methodology: Keep it as clean and minimal as you can, if you're creating a blog you don't need Wordpress or fancy JS frameworks... Keep it minimal and clean, you might be surprised how far just classic HTML and CSS can get you!
If this sounds good to you then read on. I understand the temptation to skim or skip some sections of this document however I strongly recommend you read everything as it might save you from missing steps and troubleshooting issues that could have been avoided!
The Domain Name & Hosting
Step one to getting a website up running is buying a domain name and signing up with a hosting company!
Let's start with the easiest one, getting a domain name. I have found that Namescheap is just the easiest place to buy domains. The prices are very good, the selection of TLD's (the ending section of your domain .com/.co.uk/ etc...) are great and the user interface for managing your domains is simple and easy to use. Setup an account and add a domain to your basket.
Warning
You do not need to buy any of the addons but make sure you have "Domain Privacy" (formally known as "Whois Protection") enabled!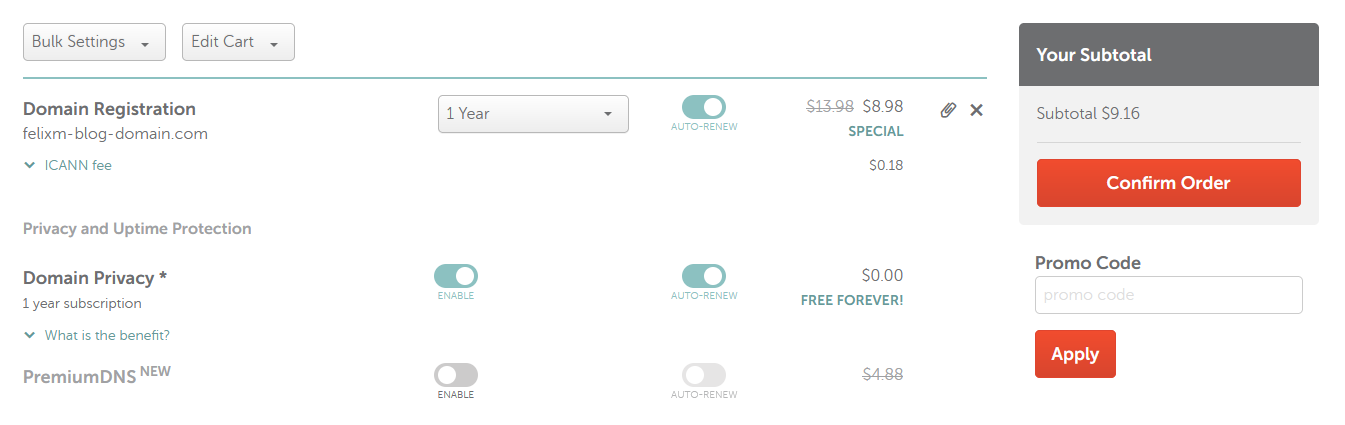
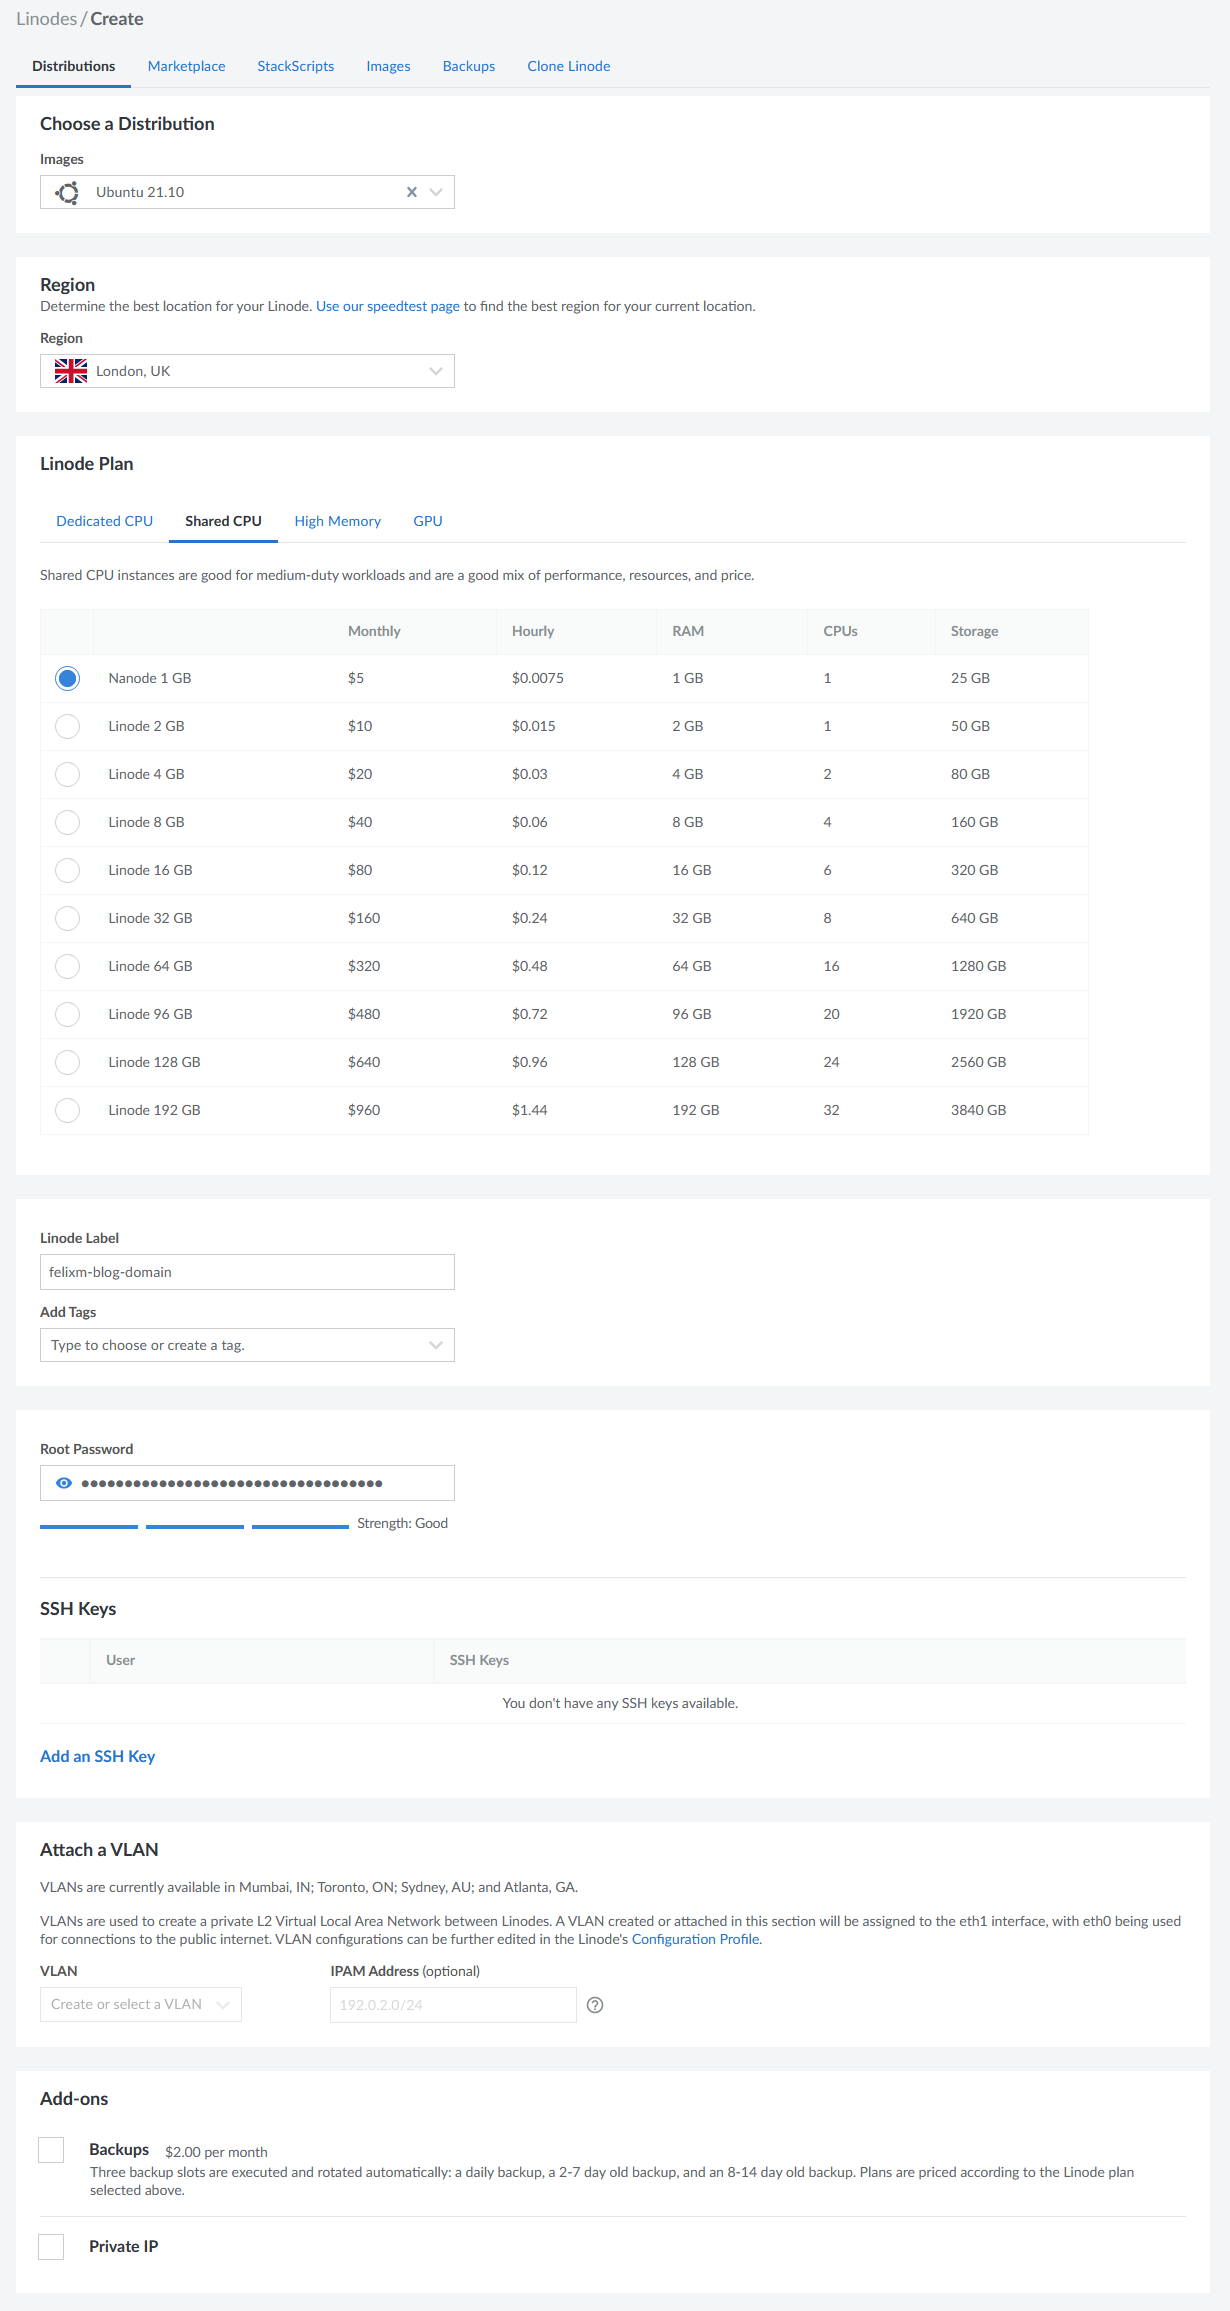
Once you've purchased a domain we can move onto setting up our hosting before coming back to configure our DNS settings. I highly recommend using Linode as your hosting provider, I've tried many hosting providers and out of all of them Linode provides the best interface, excellent pricing, flexible configuration and a whole collection of useful features such as instance cloning, rebuilding, rescue + automatic backups and the ability to add extra storage for only 10p per GB. Linode also provides a large array of instantly deployable distros to get up and running in literally seconds.
Once you've created an account you can create a Linux instance, I would highly recommend using Ubuntu Server as Apache and Nginx come with automatically generated configuration files. I'm currently running mine on Arch Linux however I spent far too long configuring what is already done for you in Ubuntu. If you don't want to setup SSL manually and want a pain free experience go with Ubuntu Server:
Once this is done we can start to set up our domain (We want to do this now as we can configure our Linux instance while we wait for the domain to propagate to be time efficient!). To do this click the 'domain' menu button and configure your domain as the following:
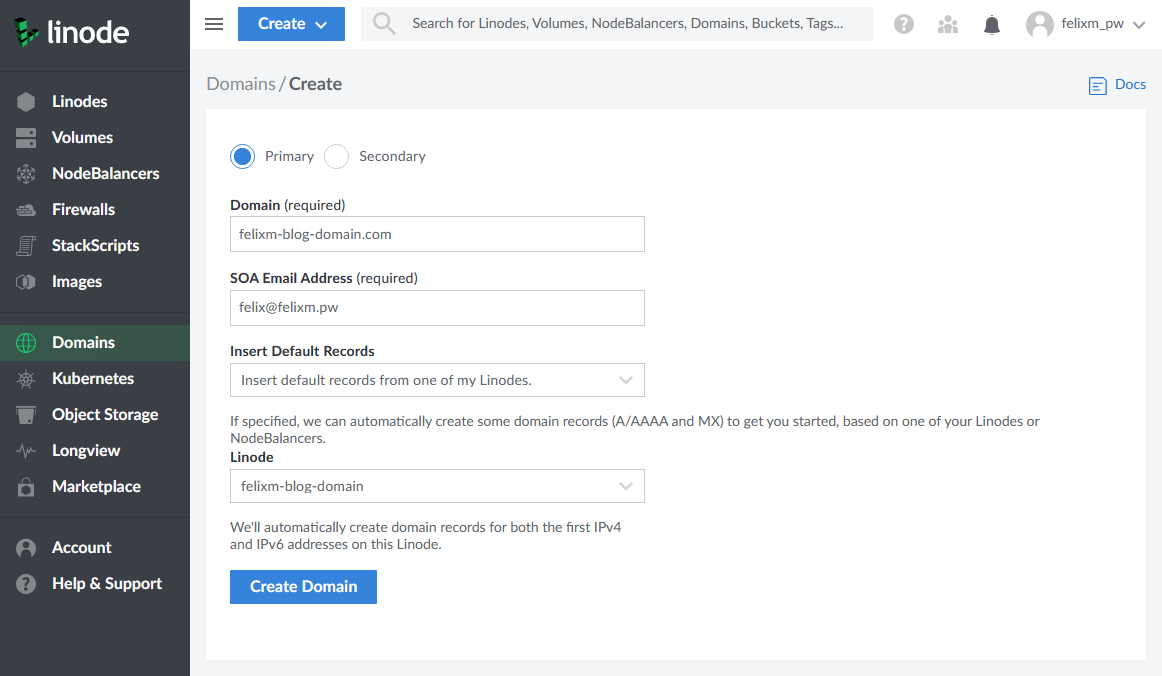
Double check that you've selected "Insert default records from one of my Linodes" and selected your Linux instance from the drop down otherwise your domain will not be bound to your instance! Once this is done hit "Create Domain" you should now be greeted by the record editor. By default Linode puts extra records for mail and www but we can leave these for now. If later down the line you want to add email redirection you'll want to edit the MX records.
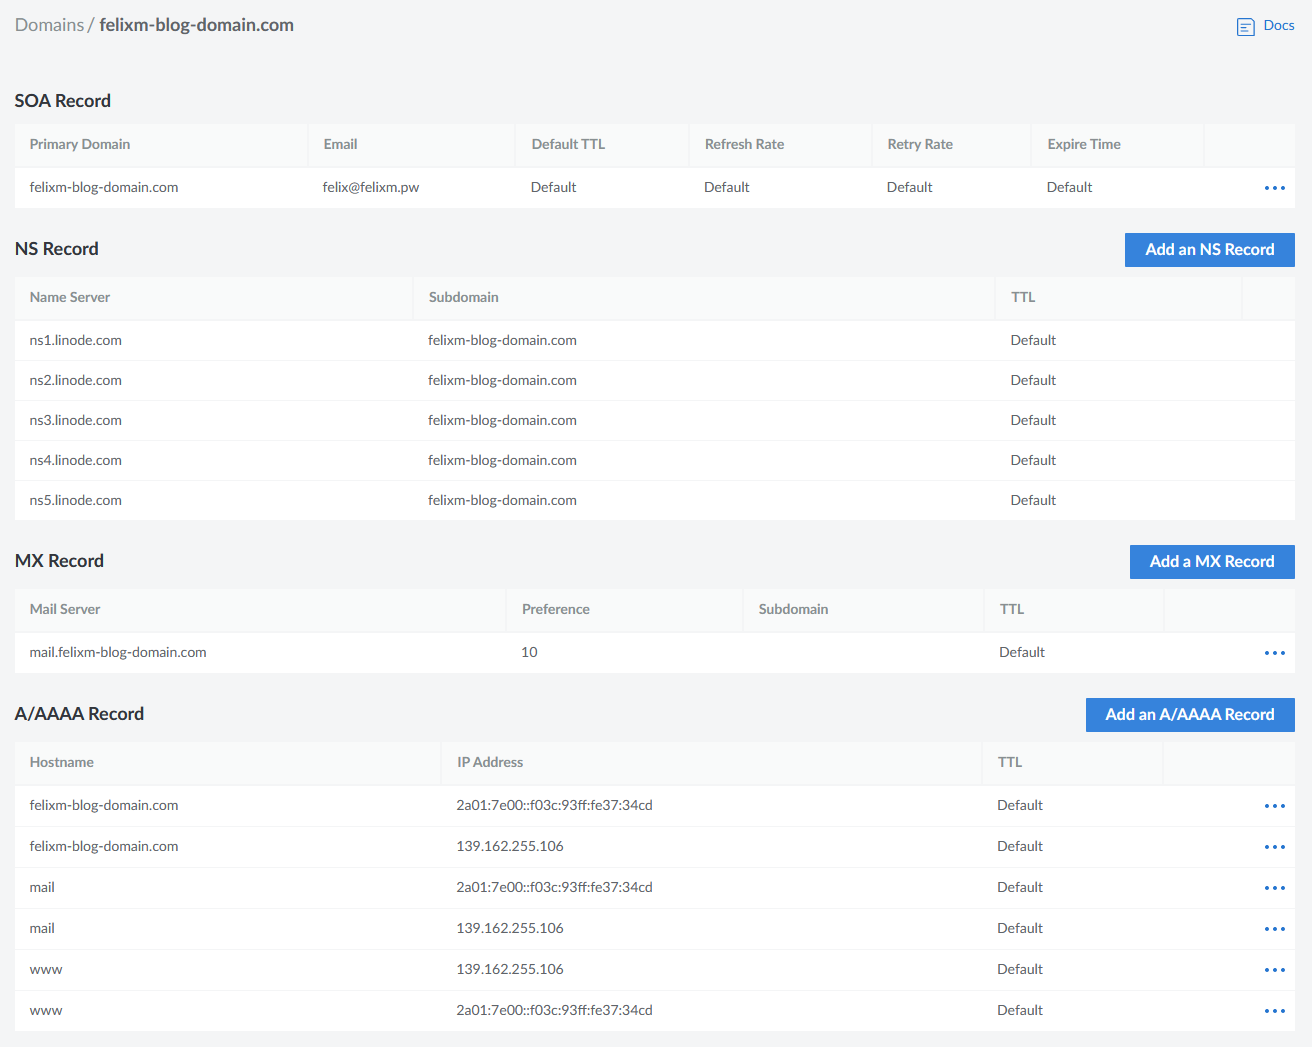
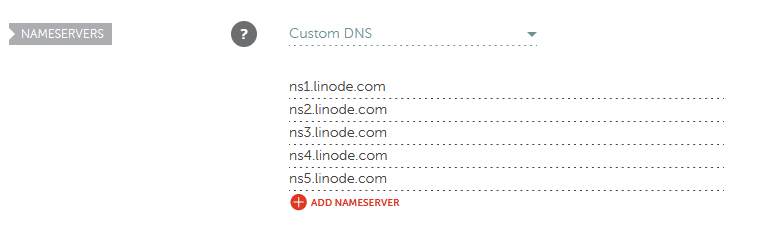
Once this is done we have only one last step to complete the DNS setup. In your NS Records you'll see the following Name Servers:
ns1.linode.com
ns2.linode.com
ns3.linode.com
ns4.linode.com
ns5.linode.com
We need to take these and insert them into the custom DNS pointer on Namescheap for our new domain. Go back to Namescheap, login and go to your dashboard. Once there, click manage on your domain:
Then just insert the NS Records as follows:
We're now done with the Domain and Hosting setup! Next we'll be setting up our Linux instance, take a little coffee break before we jump into the command line!
Warning
Your DNS will take time to propagate and it's completely normal for it to take up to an hour before it starts to point to your Linux instance.Setting Up The Web Server
Let's SSH into our new Linux instance. Grab the IP from your Linode dashboard and login as the root user with the credentials you set up earlier:
Microsoft Windows [Version 10.0.19041.1415]
(c) Microsoft Corporation. All rights reserved.

C:\Users\felix>ssh root@139.162.255.106

root@localhost:~#
Now we're in, let's quickly synchronize the package index files with their sources and update the currently installed packages with the latest versions with the following:
root@localhost:~# apt-get update
root@localhost:~# apt-get upgrade
Next let's install the following:
- - Apache (HTTP Server package)
- - Certbot (Letsencrypt's automated SSL Certificate generator)
root@localhost:~# apt-get install apache2
root@localhost:~# snap install core; sudo snap refresh core
root@localhost:~# snap install --classic certbot
Now we have installed our required software we can start apache2:
root@localhost:~# service apache2 start
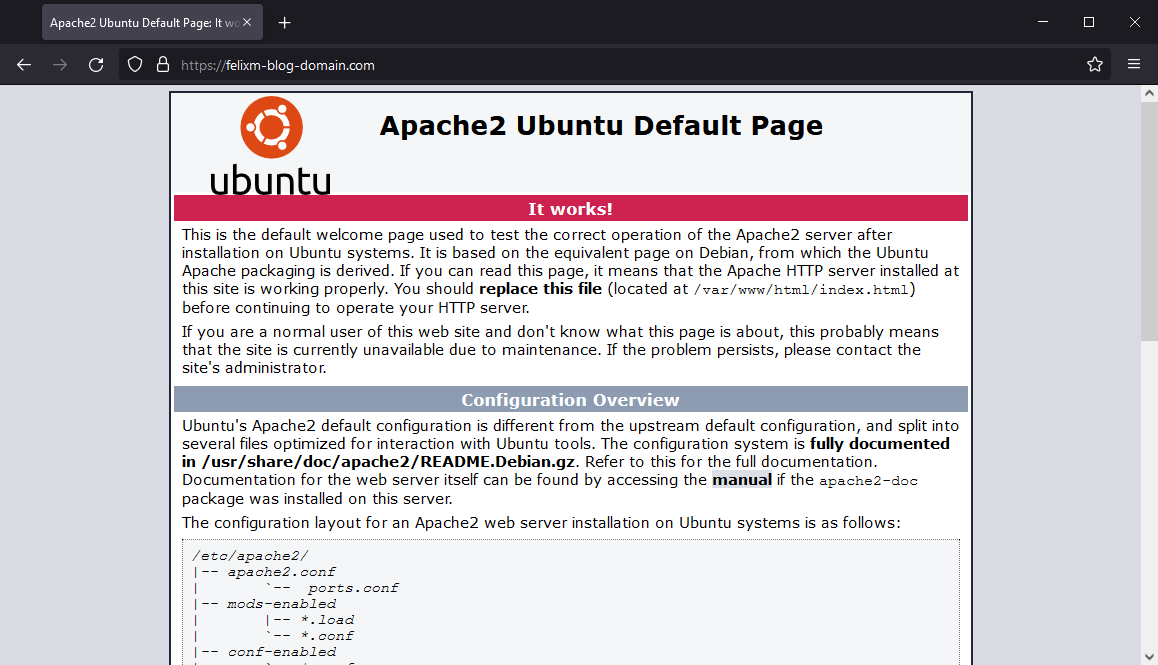
If we navigate to our website now we should see the default Apache home page:

If all works so far we can finally get SSL set up using certbot:
root@localhost:~# certbot
Saving debug log to /var/log/letsencrypt/letsencrypt.log
Enter email address (used for urgent renewal and security notices)
(Enter 'c' to cancel): felix@felixm.pw

- - - - - - - - - - - - - - - - - - - - - - - - - - - - - - - - - - - - - - - -
Please read the Terms of Service at
https://letsencrypt.org/documents/LE-SA-v1.2-November-15-2017.pdf. You must
agree in order to register with the ACME server. Do you agree?
- - - - - - - - - - - - - - - - - - - - - - - - - - - - - - - - - - - - - - - -
(Y)es/(N)o: y

- - - - - - - - - - - - - - - - - - - - - - - - - - - - - - - - - - - - - - - -
Would you be willing, once your first certificate is successfully issued, to
share your email address with the Electronic Frontier Foundation, a founding
partner of the Let's Encrypt project and the non-profit organization that
develops Certbot? We'd like to send you email about our work encrypting the web,
EFF news, campaigns, and ways to support digital freedom.
- - - - - - - - - - - - - - - - - - - - - - - - - - - - - - - - - - - - - - - -
(Y)es/(N)o: n
Account registered.
Please enter the domain name(s) you would like on your certificate (comma and/or
space separated) (Enter 'c' to cancel): felixm-blog-domain.com
Requesting a certificate for felixm-blog-domain.com

Successfully received certificate.
Certificate is saved at: /etc/letsencrypt/live/felixm-blog-domain.com/fullchain.pem
Key is saved at:         /etc/letsencrypt/live/felixm-blog-domain.com/privkey.pem
This certificate expires on 2022-06-28.
These files will be updated when the certificate renews.
Certbot has set up a scheduled task to automatically renew this certificate in the background.

Deploying certificate
Successfully deployed certificate for felixm-blog-domain.com to /etc/apache2/sites-available/000-default-le-ssl.conf
Congratulations! You have successfully enabled HTTPS on https://felixm-blog-domain.com

- - - - - - - - - - - - - - - - - - - - - - - - - - - - - - - - - - - - - - - -
If you like Certbot, please consider supporting our work by:
* Donating to ISRG / Let's Encrypt:   https://letsencrypt.org/donate
* Donating to EFF:                    https://eff.org/donate-le
- - - - - - - - - - - - - - - - - - - - - - - - - - - - - - - - - - - - - - - -
You can now attempt to visit your website:
Further Configuration
Congratulations! You now have a super clean and minimal base to build upon! Before you start building a website you need to perform some further configuration. To keep this post short I'll just overview some items you'll want to configure and you can research how to on your own:
- - Create another user
- - Add this user to the sudoers wheel
- - Disable SSH for root (you should SSH and perform admin activities as your new user and not root)
- - Configure apache2 service to auto start after reboot